How to setup EFT, generate ACH file and generate Positive Pay in Business Central
In today’s fast-paced business world, efficiency and security are key when it comes to managing finances. Electronic Funds Transfer (EFT) has emerged as one of the most effective methods for transferring funds, offering the benefits of speed and a paperless process.
To enhance security, features like Positive Pay further safeguard your payments, providing banks with the necessary information to prevent fraud. In this blog, we’ll explore how you can leverage these
powerful tools within Business Central to streamline your financial operations and protect your transactions.
You can setup EFT (electronic funds transfer) in Business Central. There are 3 main places where information must be setup properly for this functionality to work.
- Company Information
- Bank Account
- Vendor Bank Account
We will be using Business Central (US Localization) with sample data of Cronus entity. If you find any of the information missing in your database, feel free to use the sample data provided in this blog. You will, of course, eventually be using your actual data to use this functionality in your production environment.
Let us begin with ‘Company Information’
Search ‘Company Information’ in the global search bar,

Click the correct link and open the Company Information card,

Fill out the information highlighted above as per your bank information.
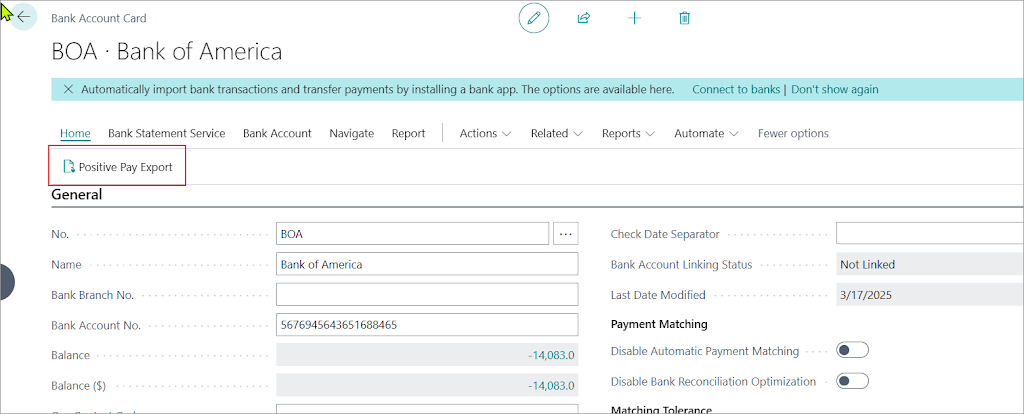
In your Bank Account card, following are the important fields that must have valid information,

Now, let’s open the vendor card to fill in the details required on the vendor to make payment to the vendor with this functionality.
To reach to the vendor list, we search ‘Vendor’ in the global search bar and click the right option as shown below.

Open the vendor which you want to pay using this functionality.

Let’s use the vendor ‘20000’ from Cronus database as shown above. Click on the number to open the vendor card. Once you open the vendor card, click on the ‘Bank Account’ from the vendor card as shown below,

When you click on the ‘Bank Accounts’ option from the ribbon. You will be able to add/edit/view Bank Accounts of this vendor.
Let’s say we want to view TD Bank from existing list of Bank Accounts that this vendor has provided.

In the Bank Account card, the highlighted fields are important to have been filled with valid information. The country must be US, and the transit no. must be valid. You can use the number given in below example if you would like to test this first in Sandbox.


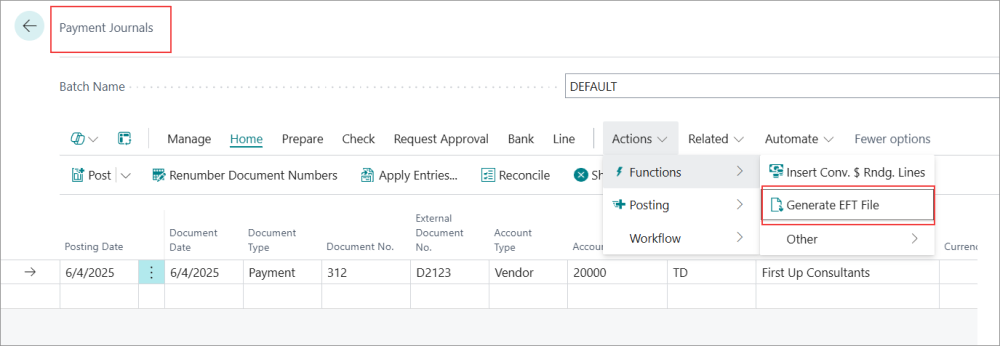
Generate ETF File
So far what we saw was only the masters and setups configuration. Now we see an example of how this functionality can be used.
Go to ‘Payment Journals’ by searching on the global search bar and click the appropriate link until you get to the below screen,

Select the batch in which you would like to create the entry. We select the vendor, and balancing will be the Bank Account.

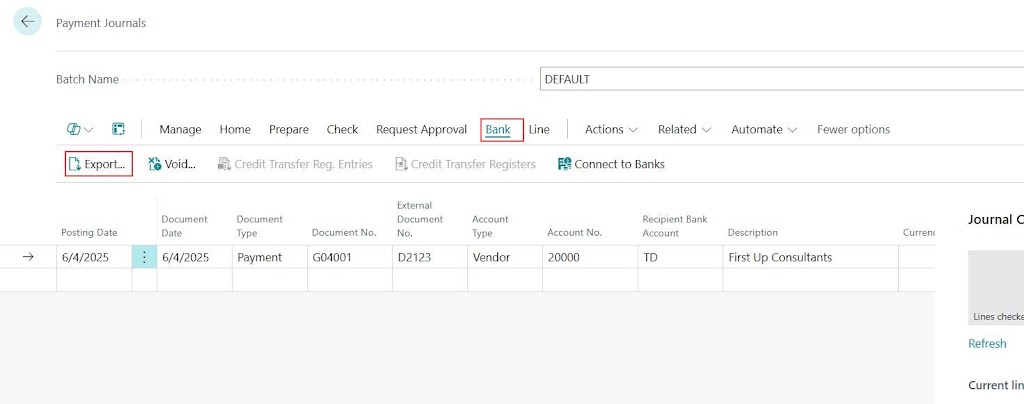
Now, go to ‘Bank’ and then click on ‘Export’
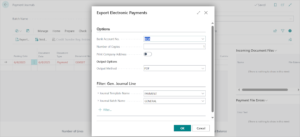


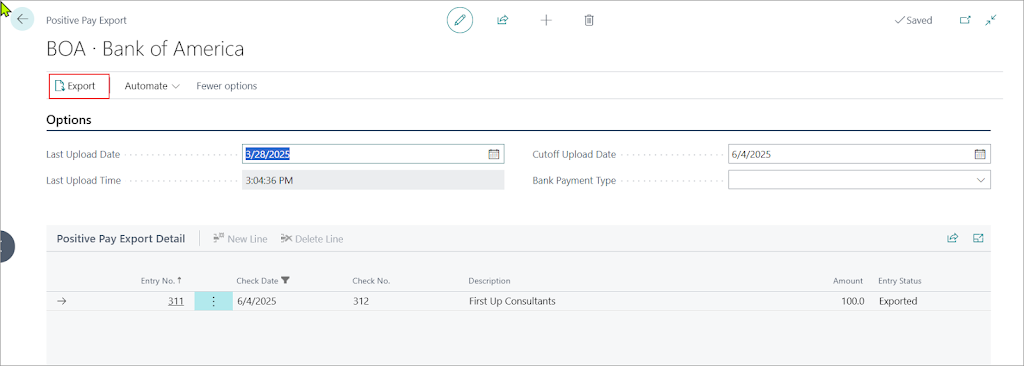

In above screenshot you can see the txt file that is downloaded.